Antique Sheet Music Flourishes

Sunday 24 August 2014

FABULOUS TELEPHONE SEAT

I have been working on my latest project over the past few weeks and have completed this bank holiday weekend.  

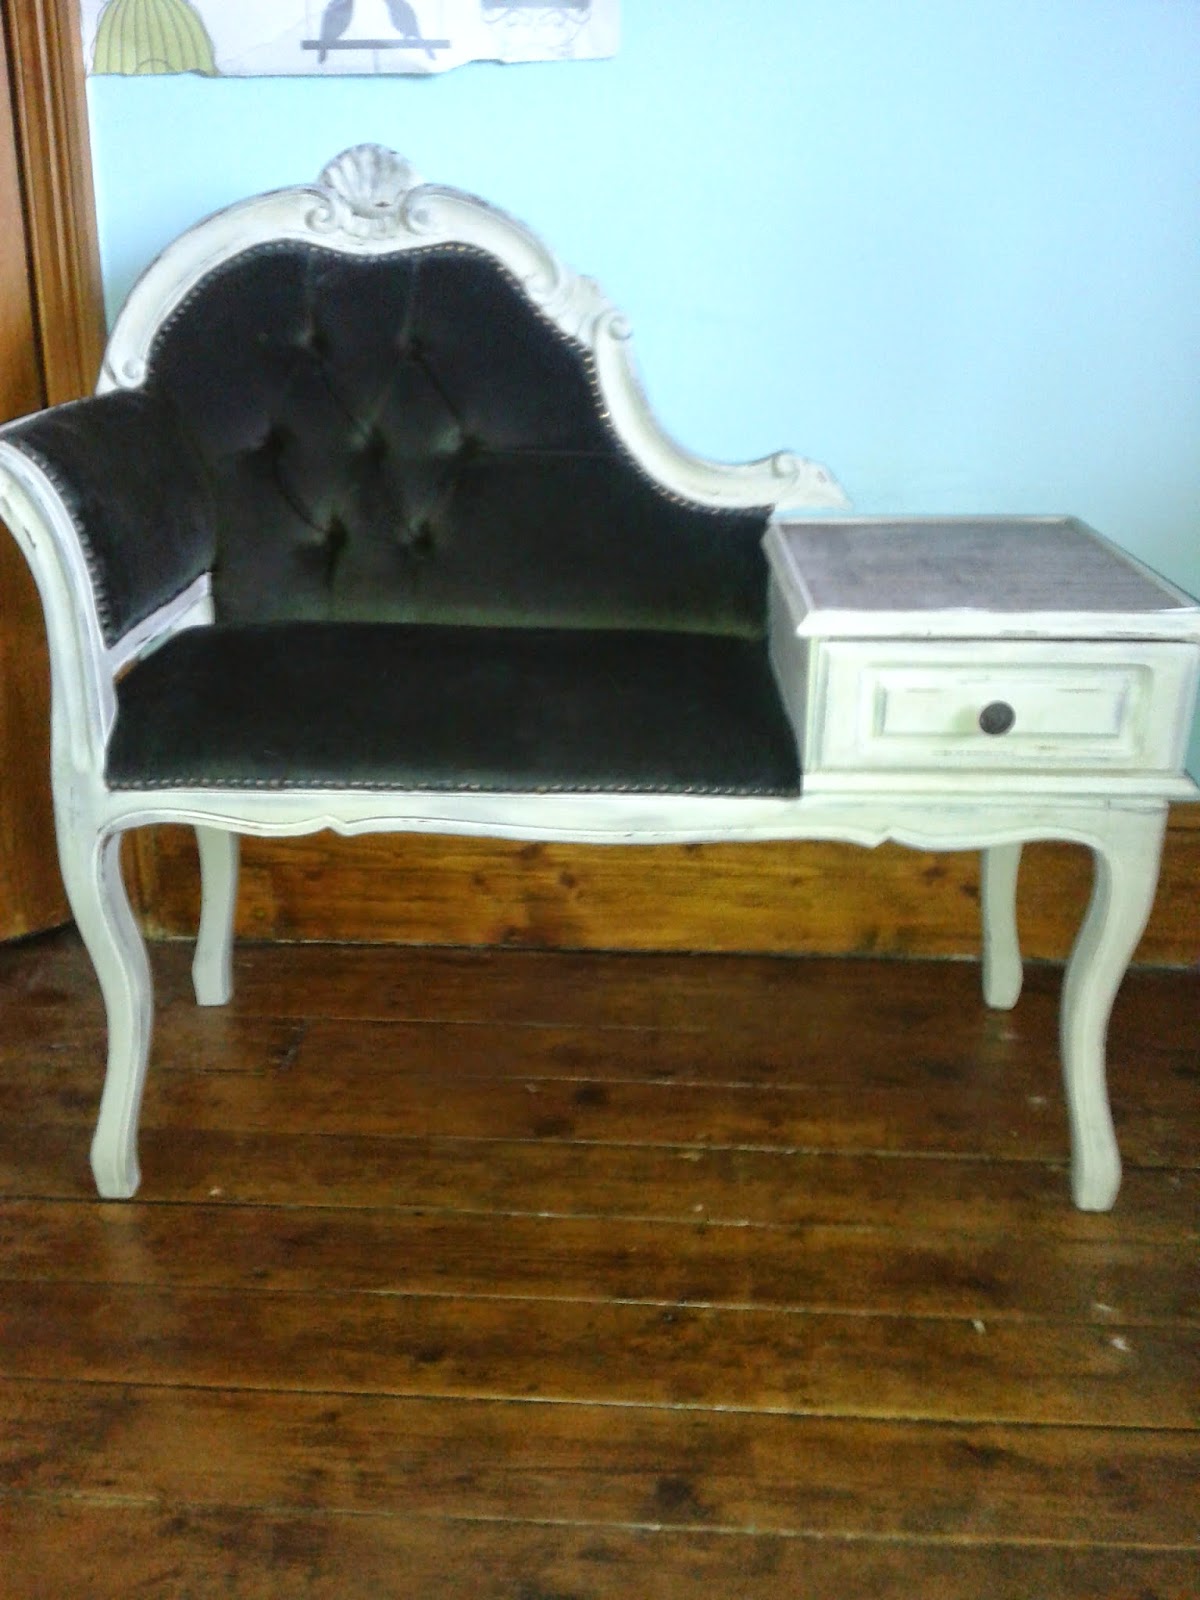
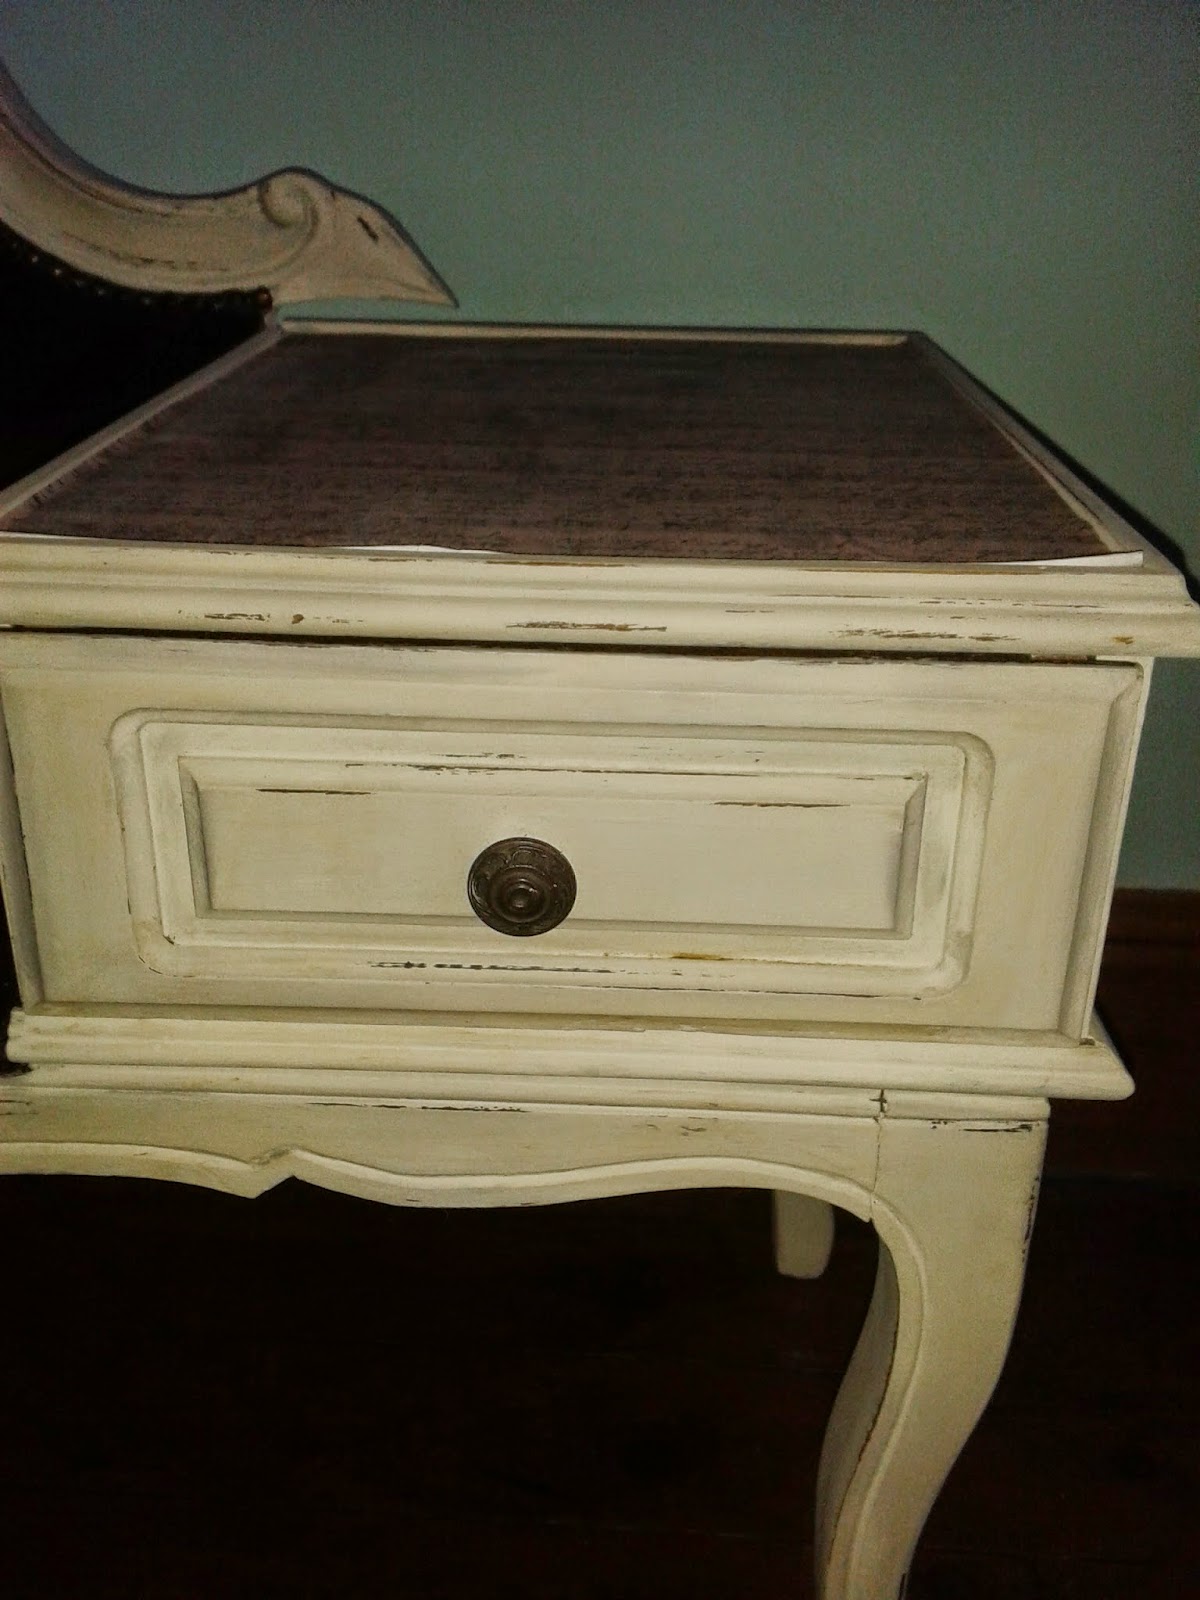
I love my new telephone seat and what a transformation.   It started out as a dated brown wood colour with green upholstery.  I have once again transformed it  by painting with 3 coats of Autentico Bath Stone, I gave the edges of the furniture a light sanding back to reveal the wood beneath and then added a layer of bri-wax to give an antique effect.  This was finished with a layer of clear wax to seal the paint finish.  The inside and top of the drawer have been covered with pretty sheet music paper which is varnished.

This will take pride of place my dining room.  Perhaps I now need to consider a traditional style telephone.

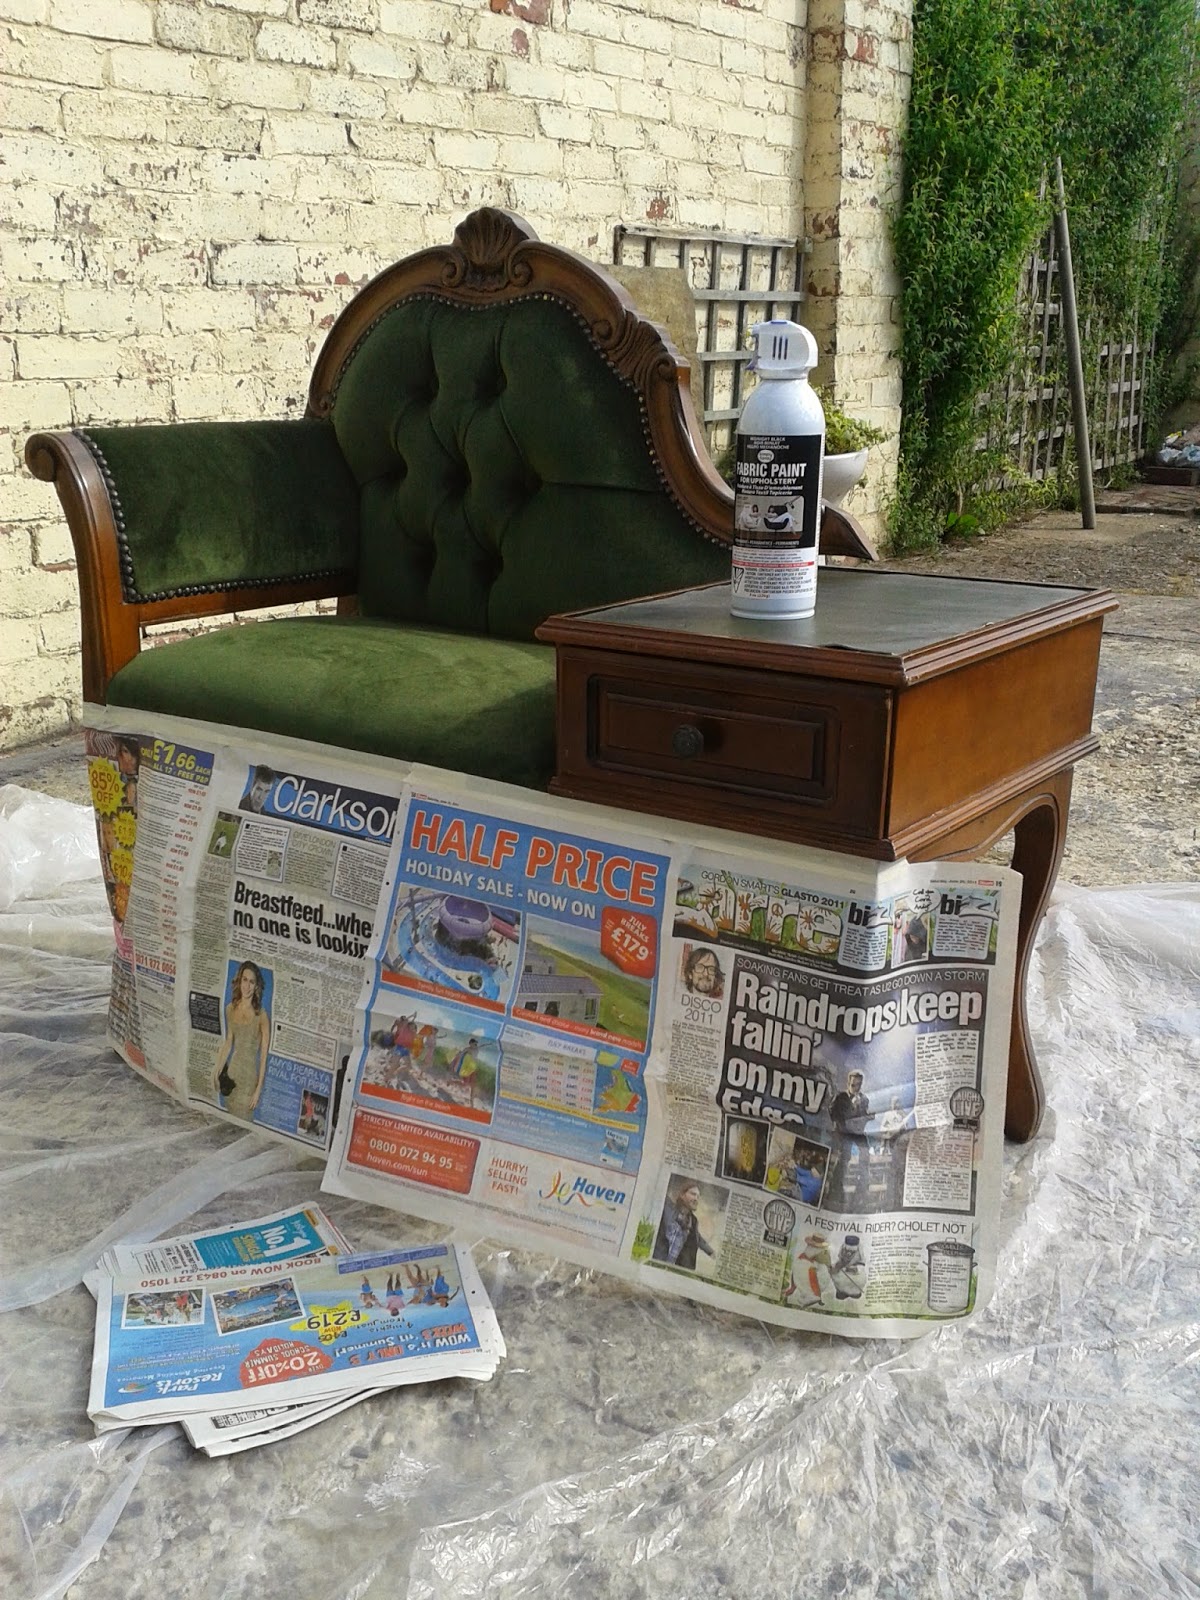
Preparing to spray
paint the upholstery


After spraying
A touch of
antiquing
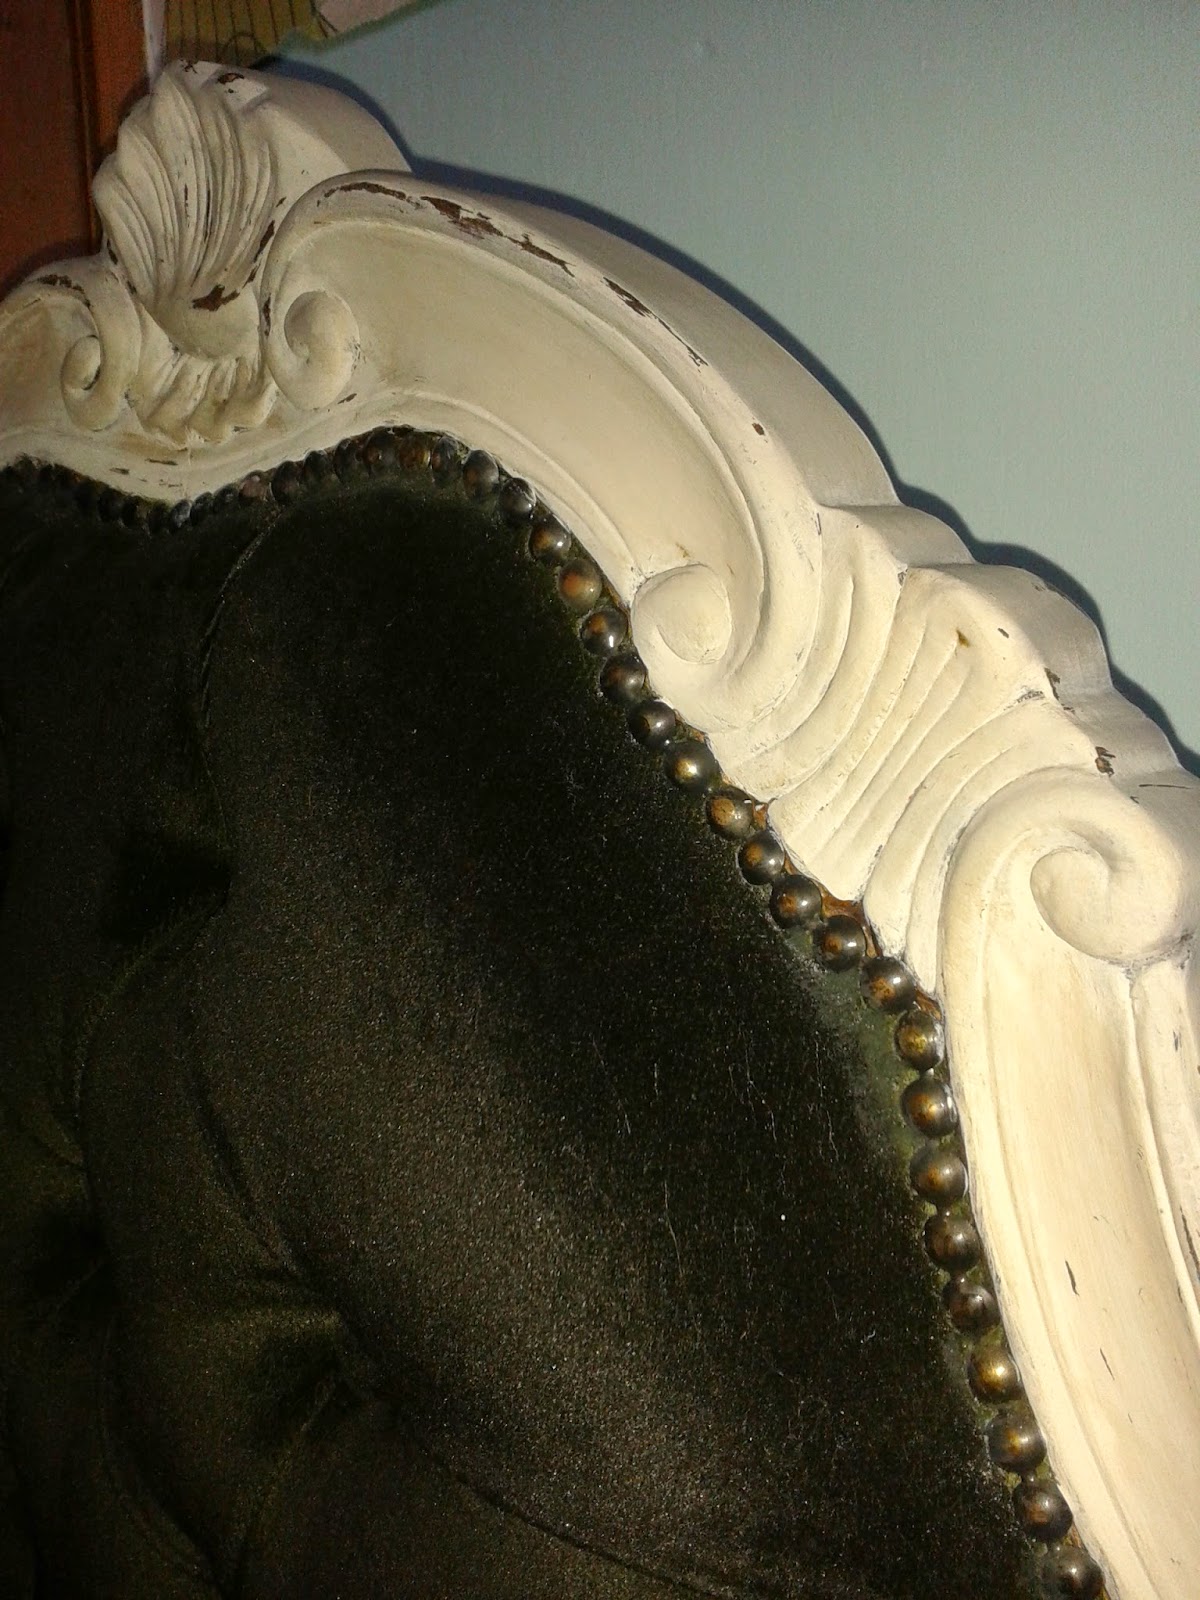
After ageing with
Bri-wax

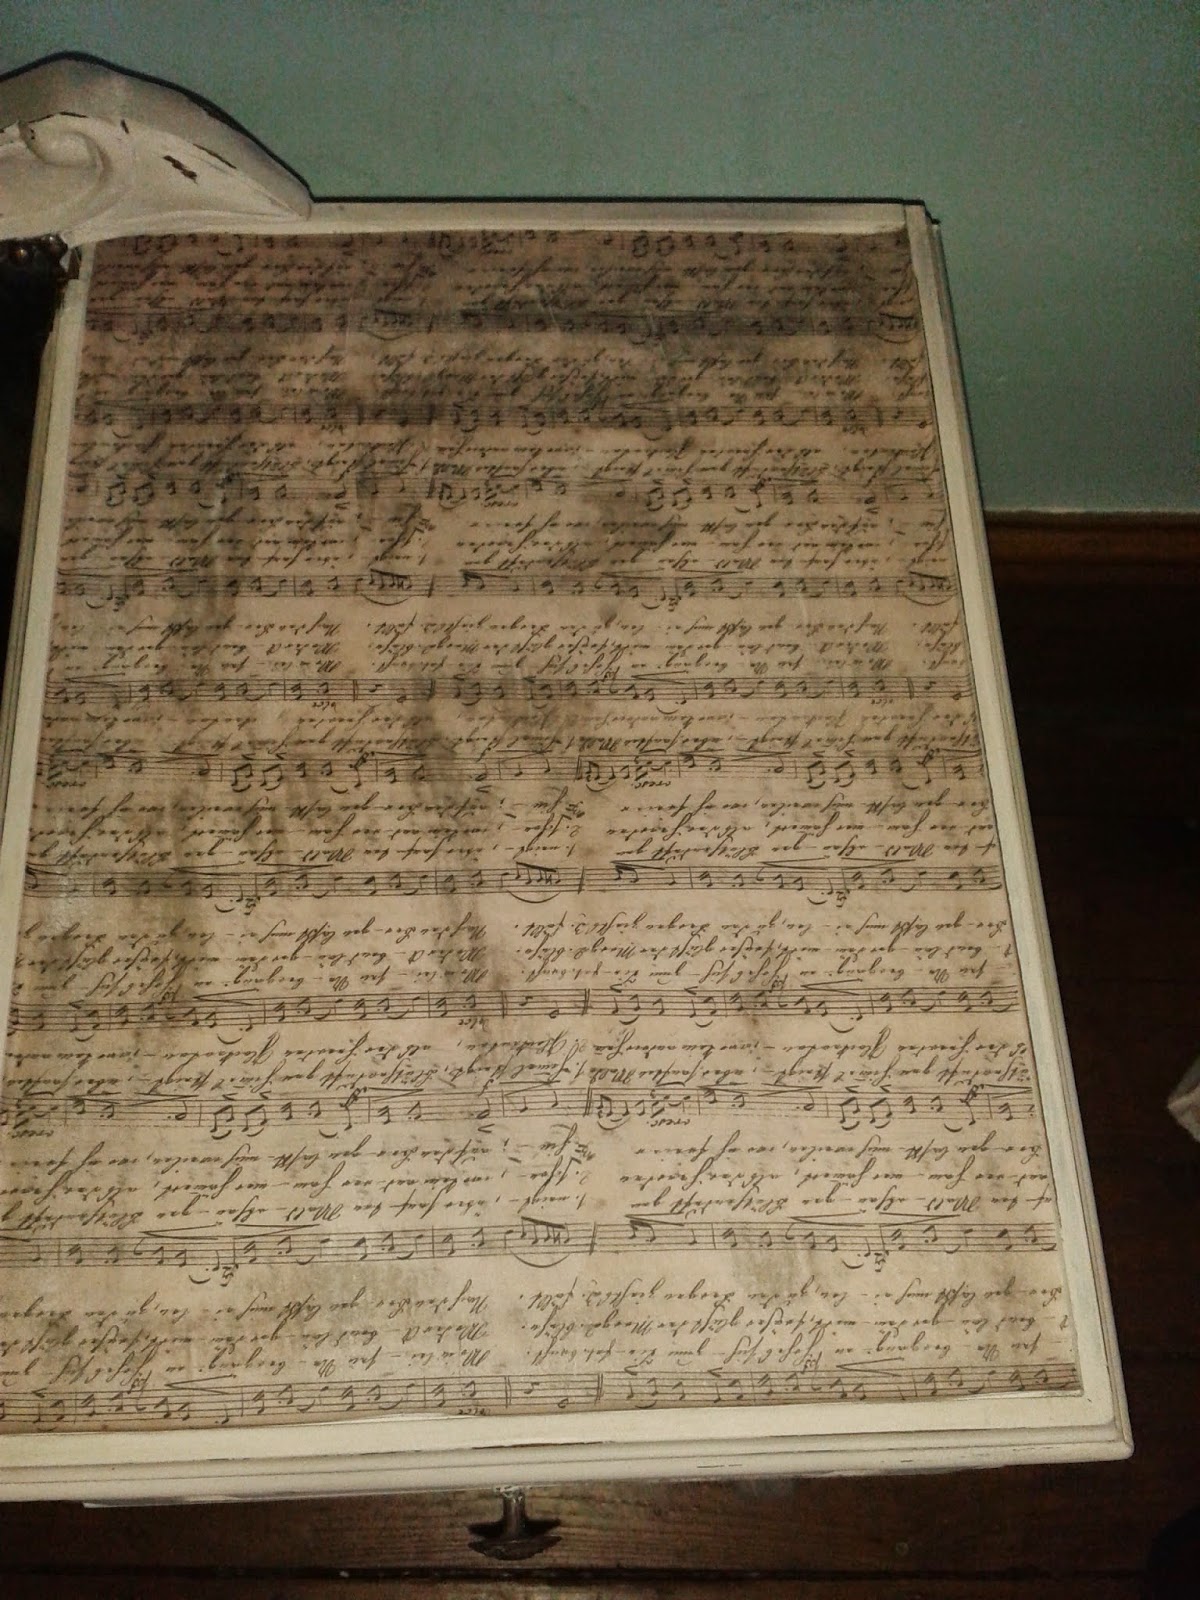
Add the finishing
touches
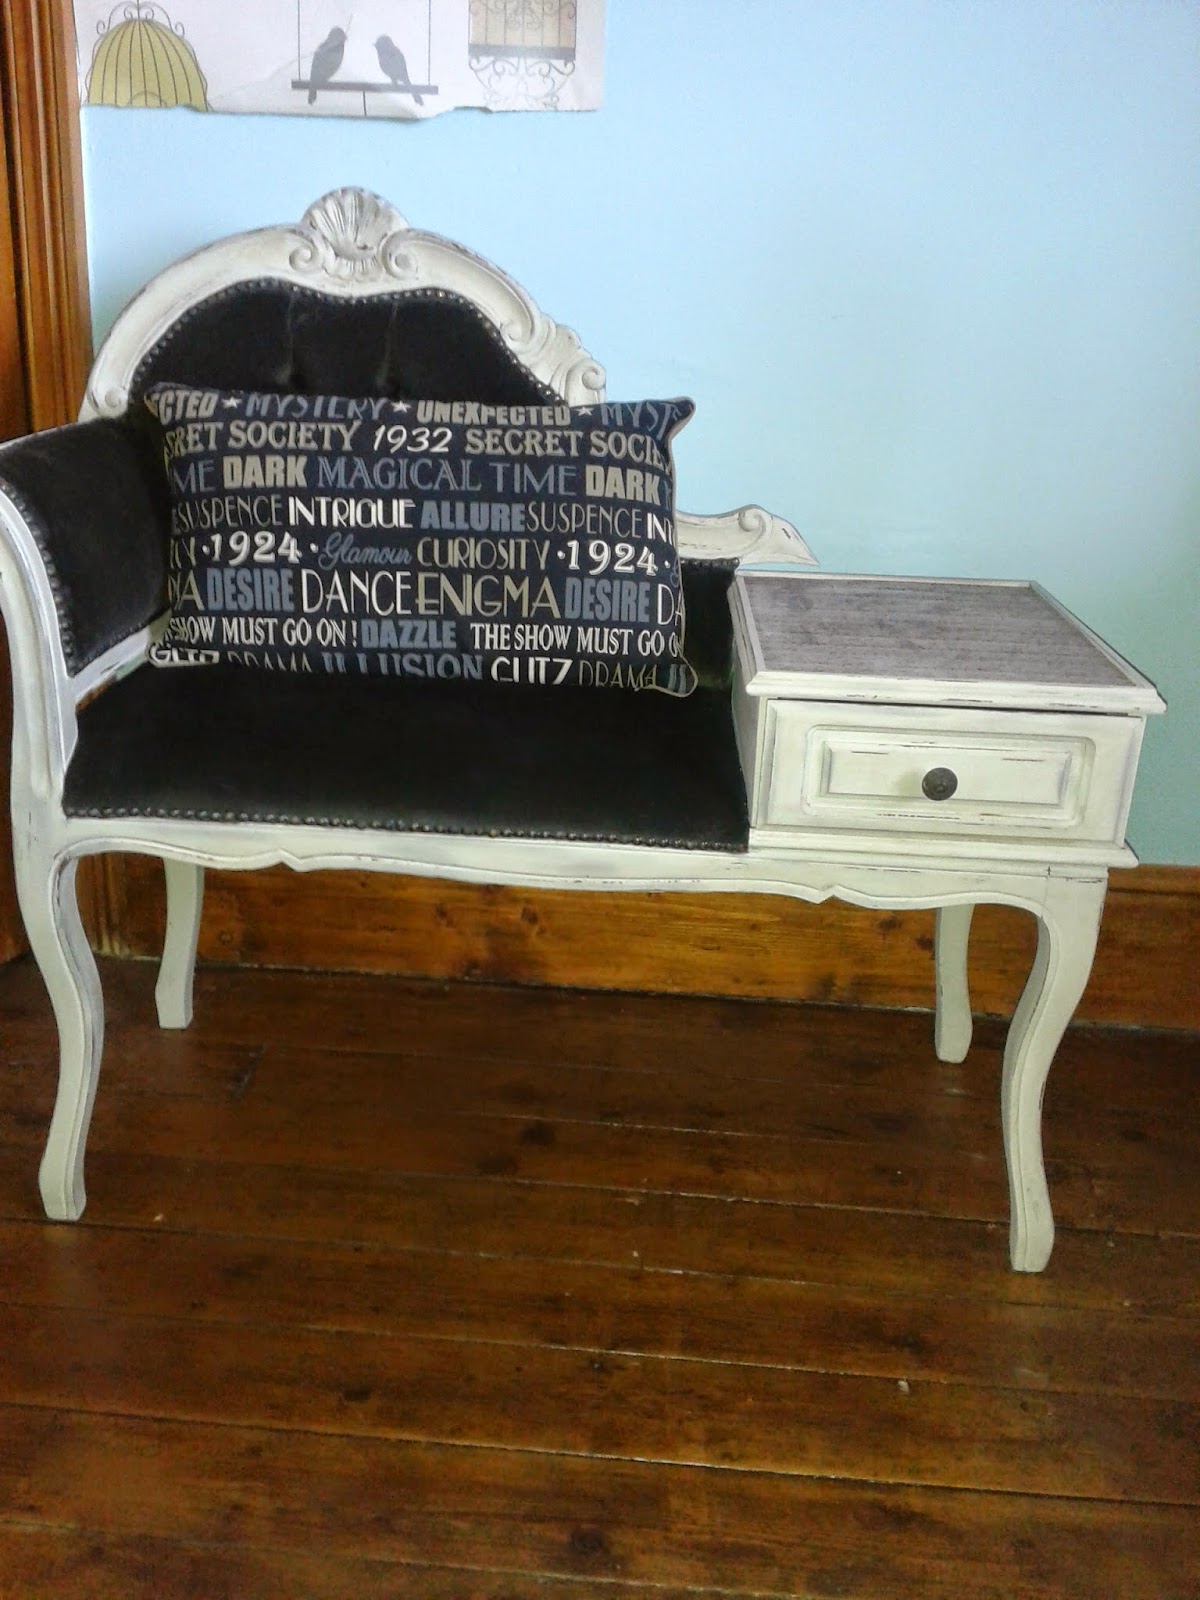
The finished
product


Sunday 27 July 2014

SPRAYING FABRIC

AFTER
I was inspired to have a go at spraying some fabric on one of my project pieces after watching "Kirstie's Fill Your House for Free" last Tuesday evening.  I immediately went online, found what I was looking for and placed my order, though I was unsure how far one can of spray would stretch.  

Today, Sunday 27th July the sun was shining so I decided it would be a good day to start my project.  Out came the dust sheet followed by my earlier purchase of one traditional style telephone seat.  I spent some considerable time painstakingly masking the piece of furniture ready to spray the green velour fabric and bring it up to date with a matt black finish.
BEFORE

MASKED UP AND SPRAYING
COMMENCES


Unfortunately one can of spray did not go too far, though I did manage to cover the fabric at the front of the piece of furniture and I must say I am happy with the finish.  The second part of the transformation will be to paint the wooden frame with chalk paint so keep following for an update on the whole transformation.
************

Wednesday 9 July 2014

FABULOUS REVAMPED WARDROBE


I am in need of storage in my kitchen area and have been on the hunt for some time for a small wardrobe to be converted to fit a space in my utility room.  Whilst browsing on ebay and items for sale on Facebook sites I finally found what I was looking for and purchased the item for the bargain price of £25.00.  I set to work having the shoe rack and clothes rail removed from the hanging space.  The  space was divided up and fitted with shelves to accommodate some of my kitchen equipment.  I painted the inside of   the cupboard and shelving with Autentico chalk paint in French Grey.  Three coats were applied then the paint was finished with Autentico clear wax.  


The outside of the cupboard was painted in Autentico chalk paint in Bath Stone and required 3 coats which were then finished off with a coat of Autentico clear wax to protect the paint finish.

I decided to wallpaper the inside of the door panels with a beautiful French vintage design wallpaper purchased from Ebay.

The final touch was to add a French stencil to the front of the cupboard doors in Laura Ashley Pale French Grey.


The inside of the cupboard
with wallpaper panels
French stencil
on outside door panels
Beautiful French
wallpaper from Ebay

I am extremely happy with the finished product.


Monday 21 April 2014

EASTER BREAK DECORATING

I finally got round to transforming the feature wall in my lounge with some wallpaper purchasedlast year.  I just needed that nice long Easter break to muster my enthusiasm to tackle the pattern matching.  The first day consisted of removing the length of dado rail from what should have been the chimney breast wall.  The holes were filled and sanded down then the wall was covered with lining paper.  Day two was marking where to begin wallpapering, I worked outward from the centre of the wall.  The pattern matching was not as daunting as I expected and after a few hours work the job was completed.  Now all that remains is to spray the mirror black and purchase some nice traditional black picture frames and some dainty prints to cover the huge expanse of wall.  I may even look for a nice fire surround that requires refurbishing in order to frame the lovely French stove making it more of a focal point to the room.  This has now inspired me to line the remaining walls before painting them in some new colours  to pull the scheme together.

The walls were in a pretty bad
state and required lining
prior to adding the patterned
paper
Adding the final piece of lining
paper.  Goodbye pink paint


The new Art Nouveau paper
gives the room a lift
A black mirror and accessories
with make more of a focal point

I am very pleased with the finished effect and now need to work my magic with some black spray paint to bring the scheme together.

SIDE TABLE USING CHALK PAINT FINISH

The course at Wentworth really spurred me on and I decided to decorate a side table which has been sitting in my cellar for months.  I decided to paint the table with the Autentico French Grey chalk paint and highlighted the decoration on the legs with the Regency White.  I then purchased a French Stencil from Ebay and transferred this onto the table top using the Regency White chalk paint.  When the paint was dry I finished the table once again with a clear wax to seal the paint.  I am very pleased with the finished effect and it matches nicely with  the other table painted in Farrow and Ball New White.  I think both colours complement each other well.

Table before chalk paint
This table required 3 coats of
 French GreyChalk Paint

French Stencil on table top

The finished tables together


TRANSFERRING IMGAGES TO FURNITURE

Here is the tray purchased for £2.00 along with
 a breadbin I already have

Completed breadbin
It has been a long time since I was here as I have been so busy. I recently embarked on a furniture painting course at the Emporium at Wentworth and learnt how to paint furniture with chalk paint by a company called Autentico.  My first project using this medium was a tray purchased at Hemswell Antique Centre for the small sum of £2.00.  I absolutely love the chalk paint finish and it is so easy to apply.  During the course I also learnt how to transfer images onto furniture from a photocopy and I was very impressed.  I have subsequently purchased some paint in French Grey from the Autentico range alongside some transfer glue and some clear wax.  My research on the internet found some images already in reverse ready to print so there is no stopping me now.

The finished tray

Both the breadbin and tray were painted with Autentico French Grey then washed with Regency White by Autentico and finished off with a clear wax to seal the paint.  The Paris motif was found printed in reverse on the internet.  I am very happy with the finished product and this has prompted me to search for other pieces to decorate.


Sunday 14 April 2013

BEDROOM REVAMP

Work complete
Finishing touches
Work complete
I finally got round to decorating my bedroom which was looking rather tired and shabby and in need of a fresh coat of paint. I started by applying lining paper to the walls for a smoother finish then applied a plain stripe embossed paper on two walls.  Crown Neutrals "Brushed Clay" was painted onto two walls and the opposite walls in Crown Neutrals"On the Rocks".  The black, beige and cream paper on the chimney breast remained the same.  The colours blend in beautifully with the new cream furniture and as a finishing touch the picture frames were sprayed black.  

I still have some finishing touches to complete the overall scheme such as painting the pine blanket chest to match the rest of the furniture in Farrow and Ball's "New White" and a tin chest that is in need of some fresh paint but I have not decided what to do with this at the present time so this will be a future project.

My hat boxes were freshened up with the coats of Farrow & Balls "French Gray" and they were decorated with some black ribbon and tags purchased on my travels.

Overall I am very pleased with the scheme and cannot wait to complete  the finishing touches to bring it all together.

Ready for lining
What lurks behind
the wardrobe


Painting in progress

Progress

It was very hard work but I am definitely happy with the finished result.